Joystick Configuration
Tribute Site |
|
This page describes the process required to define a Custom 2-Axis, 4-Button Game Pad device suitable for use with Lap Timer 2000.
The
configuration steps described below need to be carried out with the Lap
Timer 2000 joystick interface cable attached to your computer.
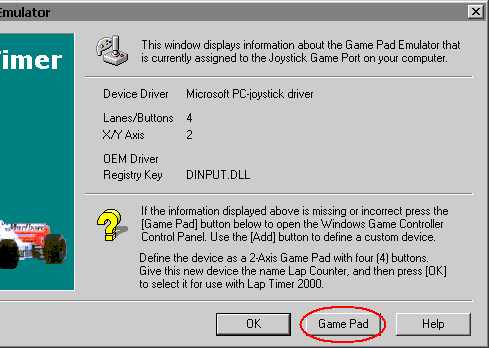
With Lap Timer 2000 active and visible on the desktop select the Edit | Game Pad Emulator menu command. After selecting this command the window shown below will be displayed.
|

|
|
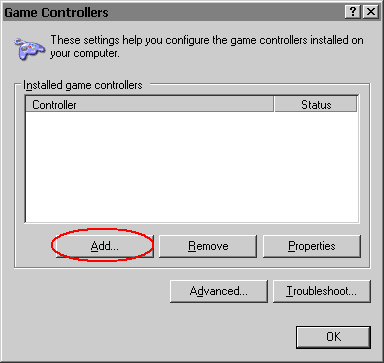
When the Game Pad Emulator window is open press the Game Pad button. This will open the Game Controllers Control Panel applet and display the window illustrated below:
|

|
|
Now press the Add button to add a new device. The next window to appear will be the Add Game Controller dialog as shown below:
|

|
|
We want to define a custom input device, so press the Custom button below the list of standard devices. DO NOT select a device from the list, but rather press the Custom button to define a new device.
The window shown below will now be displayed:
|

|
|
Select the Game Pad radio button first and then select the "2" Axis and "4" Buttons options from the pair of drop lists.
You
will also be required to specify a Controller Name for the custom
device you're creating. You can give it any name you wish, I used the
name Lap Timer 2000 because it readily identifies the device and what it's to be used for.
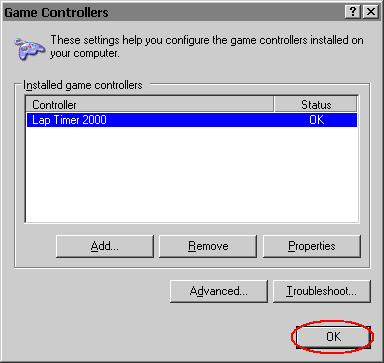
Press the OK button to confirm your definitions and return to the Game Controllers window:
|

|
|
At this point you've defined a Custom 2-Axis, 4-Button Game Pad device and given it the name of Lap Timer 2000.
Press the OK button to finish your configuration.
Note:
You will now have to exit Lap Timer 2000 and then restart it to begin
using the custom game pad device that you've just created.
|


